CLICK HERE FOR FREE BLOGGER TEMPLATES, LINK BUTTONS AND MORE! »

Friday, August 19, 2011

My Cricut Craft Room's Card and Invitation Blog Hop


Welcome to My Cricut Craft Rooms Card and Invitation Blog Hop

You should have come from Tammy if not please start at My Cricut Craft Room,
hosted by the very lovely and talented Erica, for the beginning of our blog.

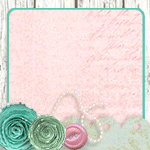
My first project is a birthday card made for a very sweet baby girl who is turning one.  She is the daughter of my granddaughter's lifetime friend.


Cricut carts I used~

Elegant Edges
George And Basic Shapes
Wrap It Up


I number the grapics in the handbook and overlay 1-50
Using the Gypsy I chose #4 shown on the overlay in Elegant Edges cart.
cut~ 5.74-7.00
I then layered # 17 in the George and Basic Shapes (rounded corner rectangle)
sized at 3.16-4.29 in the center of #4 to create a frame for the front of card.
Using the Gypsy I made a duplicate and welded the two together on the sides
to make a complete folded card.  I removed the cut-outs on the right side with the
 hide/contour feature as seen in the picture below.

This is after welding and hiding the cut-outs.  What you see in red is what will cut.
I cut two, one in white for the outside and one in pink for the inside.
I used Colorbok cardstock.

Next I cut the #17 rectangle out of a pink and white zebra patterned paper purchased at LSS.
Gigi Pink Zebra by Glitz Design
cut~ 3.34-4.53
Cut just a little larger then opening to place in frame between white and pink.

Wrap It Up Cart~

Candle - Cut~0.86-4.18
I cut out flame with yellow cardstock and yellow vellum and layered for a glowing effect.


Inside of card~

One Year Old, # 41 Phrase/S in the Wrap It Up Cart
Hide candle
Cut~4.34-4.18
The phrase was actually One Year Older and I cut off the er.
I used the green from Provo Craft Cricut Rainbow.
This was cut on the Expression ~ Settings low speed, medium pressure, blade depth 6 

Happy Birthday Sweet Baby Girl!

My next project is a Back to School Card

One of my daughter's BFF's who is a first grade teacher asked if I could design a back to school card to send to the students that would be in her class. She decorated her room in a circus theme and it is truely magical! I wish I were a kid again...this room is awesome!

Her idea of a ticket worked out great as I had just picked up the Cricut Carousel Lite cartridge.


I chose what I thought was a pretty simple image #55 <Font/s>, unless your doing multiples
I used red and yellow cardstock by Recollections Primary, cutting red with ADMIT ONE
and yellow with out. 
The image has three cuts ~
Outer part of ticket, frame and center.


The centers were removed and replaced with white card with information 
generated on the computer.

To keep the letters uniform and  make the project faster I placed the negative rectangle
back in the frame.  I then applied glue in the negative space and replaced the letters back in like
a puzzle.  (One at a time)
I used the Cricut tool to smooth into place and help hold letters down as I removed the
negative.

I carefully pulled up the negative immediately, leaving ADMIT ONE exact everytime.


 Welcome back to school!  I hope everyone  has a great  year! 

Next you should go to


 If you get lost along the way, here is the entire lineup...


http://mycricutcraftroom.blogspot.com  (special post for blog candy)


Thanks for stopping by
and
Happy Crafting! 


Saturday, August 6, 2011

My Cricut Craft Room's August 100+ Carttridge Blog Hop

Welcome to My Cricut Craft Room's August 100+ Cartridge Blog Hop, hosted by our very talented team leader, Erica.  If you came from Crafting with Courtney, you are in the right place.  If not then please start at the beginning with Erica at My Cricut Craft Room so you will be sure not to miss the rest of this wonderful team.

Today 'Cricky' wants to help me tell you about a very special 5th Birthday Party for my grandson Landon!  Can you guess the theme?  Yep...I'm a dork!

Here's your invitation~


Thank you for coming!  Let's get started with the Party...I mean Hop!

Carts I used~
Life's A Party
Birthday Bash
Blackletter

I used my Gypsy for everything.

Life's A Party~ Card
You can find the invitation card on pg. 44 of your handbook~ #34.  (I number 1-50 on the overlay)
<card> (what you will see in your handbook)      cut~4.48-5.59,  tan cardstock, inked with Tim Holtz Distress Ink  -walnut stain-  and Color Box Chalk  -amber clay-
Pirate Party is the phrase feature (keys on the left of your overlay) pg.54- #44.  Pirate Party w/sword is <card> using gray cardstock,   cut~ 4.62-3.91.  Pirate Party is < card s> (that's card feature and shift)
using black cardstock,   cut ~ 4.16-3.1.  I heat embossed the sword blade with silver opaque embossing powder. 
I continued to ink on the inside of the card.   Arrrg! is on pg. 44- #34, <phrase> in black cardstock   cut3.10-1.12. (bottom layer)  <phrase s> in red cardstock,   cut~ 3.10-1.12   (top layer)

I used my Xyron a lot!

I also used this tool...it's great for picking up small pieces.  I just dip the piece in a dot of glue on scratch paper and place.  It is The Quicker-Poker-Picker-Upper! by Quik Kuts.  See the tiny letter?
It really came in handy with the small font from Cricut Cartridge Blackletter,  black cardstock   cut~0.76.  The map, again with L A P, pg. 44- #34 using black cardstock <card s>   cut~ 5.59.  The red X is the layer feature <layer>   cut~ 2.51-5.59.  Instead of the circle I decided to use my grandson's picture to personalize the invitation.  He was more than happy to poise as a pirate!  I made this picture into a charm using this great kit I purchased from Little-Windows brilliant photo jewelry.  it doesn't show well in the card but I used the doming technique on the little picture I created with the online software that comes with the kit.


After cutting the picture out you pour just enough resin product on and it flows to the edge creating a beautiful charm! I added this to the card with removable adhesive so it could be saved.

I placed this map at the entrance to welcome guests and let them know X marks the spot.

Map pg. 44 - #34
Black cardstock <map>  cut~ 11.94-11.00
Tan cardstock <map s> 11.33-11.00
Red cardstock  X  layer feature    cut~ 4.99-11.12
Pirate Party here ~ Font~ Cricut Cartridge Blackletter   Black cardstock,   cut~ 3.75-3.35 

I'm such a proud Mom...my daughter made a beautiful pirate ship cake!
I made the masts which you can find on pg. 34- #14 ~ card feature.
I made one red and two white cutting the card in half at the score lines creating 5 masts. Then I applied a picture of  the birthday boy on one and skull and crossbones on two.
<skull>  black  cut~ 3.47-2.18
<skull s>  white  cut~ 3.47-2.18
skull cap layer feature,  red dotted paper,  cut~1.96-2.18
The red were left plain.

I'm in love with the cupcake wrappers and toppers!  They are so simple and you can create a theme in a sec!


I used blue glitter paper by Best Occasions and Color Bok
The ship wrapper is on pg. 24- #4 using cupcake wrapper/topper feature (from now on will be noted as cw/tf)   cut~ 9.93-2.06  I had a large cupcake liner so I would suggest measure what you are using and adjust accordingly.
By the way the treasure chest in the picture was purchased at Hobby Lobby.  I stained it and added the stickers  (from my stash).

The black paper with scull and swords came from Hobby Lobby by Paper Studio.  I used cw/tf  on pg. 44 - #34  same cut.

I used the hide/contoure feature on my Gypsy to remove the ship cuts to make a solid liner in white copy paper to create the masts in the layer.  I hand cut the shape of the boat from brown paper and glued it on the white paper to line up with the blue layer.  (see arrow)
I did the same with the black scull wrappers.

I wish I had close up pictures of each flag.  I was so pleased with how they turned out.
I used three different shapes using Cricut Birthday Bash Cartridge  <font s>  #49 cut~ 8.42-11.59,
#52   cut~10.75-11.59,  #50  cut~ 8.39-11.59  using kraft cardstock and pirate themed patterned fabric I bought in scrap packs at Wal Mart.  I sprayed the kraft paper with Elmer's Craft Bond Spray Adhesive and applied the fabric. 
Again, I used the Blackletter Cart font  for Landon. 
L is cut in white, shadow feature, at 6.30-8.06 (bottom layer)
L again in black shift -  cut~ 6.06-8.06
White a - shadow- cut~  ?-8.06
Black a - shift-  cut~ 3.79-8.06 
and ect....the rest will vary in width size but keep it at the same height.

A Pirate's Life for Me with Ship Wheel ~ pg. 34 #14 Phrase feature  cut~  11.58-8.65

Sword~  pg.24 - # 4  <cupcake s>  cut~  3.74-11.59
I heat embossed the blades on these as well

Skull ~ pg. 34 #14
<skull>  Black-  cut~ 11.53-7.24
<scull s> White - cut 11.34-7.12
scull cap~  layer feature  - Red dotted paper-   cut~ 11.73-7.35

Treasure Chest ~ pg. 24  #4 
<treasure>  Black  cut~  10.70 -9.00
<treasure s>  Brown  cut~ 10.70-9.00
Both rotated 90 degrees to fit on mat using the Gypsy.

Treasure/lock and handles ~  Gold metallic paper found at Hobby Lobby  cut~ 9.72-8.88

Landon says,  "It's a Pirate's Life For Me!"

   
 Thank you for dropping by, I hope you enjoyed the party!

Please continue on the hop and the next stop will be


If you happen to get lost, here is a list to help you find your way.

My Cricut Craft Room http://mycricutcraftroom.blogspot.com
Patricia Holloway  http://micraftygal.blogspot.com/
Nina Wilson  http://nina-hotpinkscrapper.blogspot.com/

Happy Crafting!